One Room Challenge - Week 3 How to Create, Build and Make a Headboard - Upholstery 101
- Nicole Lucevic

- May 23, 2021
- 3 min read
I have had this bed for 11 years... probably time for a new mattress but instead I took on the headboard. By take on, I mean take apart and completely recreate. I L O V E it!
It took me a total of 2 weeks to create this piece and in normal hours its probably 10 hours.
Things I purchased - Gorilla Glue Spray Adhesive ($8.98), pneumatic staple gun ($33.28), Jigsaw ($49.98) $5.00 worth of 3/8" staples, 1 bag of 24"x72" - 1" thick foam ($16.19), and 1 panel from a $29.00 scrap fabric bag from Ikea... it was a curtain panel!
Things I had - base to headboard, scrap MDF
How to create the look:

Step 1.
Deconstruct
First I deconstructed the original headboard... using pliers and a flat head you can get them all out. I kept all the materials and used the foam and the backing again - careful to keep the integrity of the piece.
Step 2.
Create your design
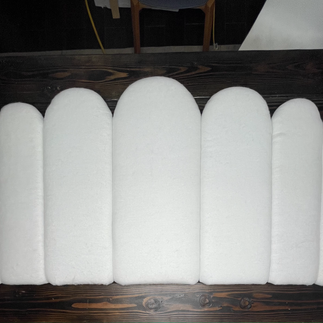
I changed my mind quite a few times and in the end I ended up combining a few different ideas. I went with 4 different sizes with 7 pieces total. I was able to cut the boards down using a rip kit from kreg jig and selected the sizes using bowls.
The sizes are 4" | 7 1/2" | 11 1/2" | 13" | 11 1/2" | 7 1/2"| 4" - I used a salad bowl, dog bowl, planter, charger and mixing bow.

Step 3.
Make your panels
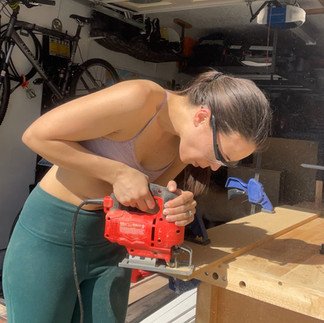
I cut the wood based on the sizes above and then traced the bowls on the top of each board. Using clamps I was able to cut all the aches with the jig saw and then sanded them down with 120 grit to finish it off.
Step 4.
Prep for foam
Wipe everything down. Lay out a table cloth or something you don't care much about. We used our painting table cloth. Spray the adhesive on the board - I used gorilla glue spray adhesive for this process. Then after waiting 1 minute place on the foam. You can move it for up to 3 minutes. I then stacked my boards. I personally let this sit outside overnight to keep the fumes out of the house. Its super simple to do and works great. The yellow foam is the scrap from the original boards. If you do not have scrap you will need 2 bags of foam.

Step 5.
Add the batting
When you cut the batting you want to make sure you have at least 3/4 inch to wrap around the foam to the board. You will do the same thing with the fabric. When i deconstructed it was two separate steps so we assembled the same way the original was made.
Staple on the batting. I decided to double up on batting to give it more depth. When you staple you start with the length and pull lightly when every staple.
in the center on one side (A)
left and right on other side (B)
staple the rest of A
staple the middle of B and the ends
staple the bottom middle
staple the rest of bottom right
staple the rest of bottom left
fold in the ends and staple
staple the middle of the top
pull and staple left and right of center until you have completed all stapling of the board
Step 6.
Add the Fabric
Following the steps above add the fabric. Don't be afraid to mess up. Just use the pliers and flathead to remove messed up staples. I used about 1,500 overall to complete this project

Step 7.
Finishing up base and backing
To make it look complete from all sides I used the rest of the scrap to trim out the sides and cover up the back of the exposed panels. Trim the scrap to size, staple to MDF, make sure you have enough on both sides of the piece your covering
Step 8.
You see above in the right picture that there are several holes cut out. I used a circle bit and drilled the openings on the top of the board and then used a short screw and drill to secure it to the base. There is 1 1/4" overlay on both sides. This won't be seen once the bed is completely back together.
If you notice 2 small holes on the left side of the board - that is the spot to secure the headboard to the bed frame. This will take place next week once I finish sanding down the frame. Tune in on stories for the process in real time.
I am not the only one doing a bedroom renovation. There are over 400 participants doing this springs One Room Challenge. You're sure to find inspiration with any part of your home here - www.oneroomchallenge.com/orc-blog
Let me know.... would you have kept the original or take a chance and create something completely different and new?
Before and After


Comments